Wednesday, November 18, 2026

Cleaning the Oven Without Harsh Chemicals Overnight

Cleaning the Oven Without Harsh Chemicals Overnight
Photo: Wikimedia Commons

Cleaning the oven without harsh chemicals comes down to time rather than heavy elbow grease. You mix a simple paste of baking soda and water, spread it over the grease, and let it rest overnight. The crust softens on its own, so you only spend about fifteen minutes wiping it down the next morning.

The Supplies You Need Before You Start

Gather everything on the kitchen counter before you open the oven door. Using everyday kitchen staples protects your lungs from strong fumes and keeps food preparation areas completely safe. This approach matches standard cleaning principles that rely on dwell time to break down heavy kitchen soil.

  • Half a cup of standard baking soda
  • Three tablespoons of warm tap water
  • One spray bottle filled with plain white vinegar
  • Two damp microfiber cloths and one silicone spatula
  • One pair of reusable dishwashing gloves
Cleaning the Oven Without Harsh Chemicals Overnight
Photo: Openverse

How to Make and Apply the Paste

Stir the baking soda and warm water together in a small cereal bowl until it forms a spreadable texture like thin pancake batter. If the mixture feels too dry, add a few drops of water until it glides smoothly across a spoon. Take the metal racks out of the oven and set them aside on an old towel next to your sink.

Put on your gloves and scoop the paste with your fingers or a silicone spatula. Spread the mixture all over the back wall, the sides, and the bottom floor of the oven. Avoid the bare heating elements and the gas flow tube entirely. Coat the brown grease patches with a thick layer, close the door, and let the mixture sit for at least eight hours or overnight.

How Do You Get Burnt Grease Off the Oven Floor?

The dry baking soda paste turns chalky and brown as it draws out the baked oils from the enamel. Take your damp microfiber cloth the following morning and wipe away the loose paste starting from the top shelf supports down to the base. If any spots stay stuck, push the edge of a plastic scraper or silicone spatula against them gently to pop the crust free without scratching the enamel surface.

  • Wipe out the bulk of the dry paste with the first damp cloth.
  • Mist the remaining powdery patches with white vinegar from your spray bottle.
  • Watch the vinegar react with the leftover soda into a gentle white foam.
  • Rinse the second cloth in warm water and wipe the floor until it shines.

Soaking and Scrubbing the Oven Racks

While the oven interior is resting, give the metal racks your attention in the bathtub or a deep utility sink. Lay an old bath towel on the bottom of the tub to stop the steel wire from scratching the tub surface. Place the racks flat on top of the towel and sprinkle three tablespoons of washing powder or dish soap across them.

Run hot water until the racks are fully covered by two inches of water, then let them soak undisturbed for four hours. When you return, the softened grease slides off with an ordinary kitchen sponge and minimal effort. Rinse each rack with clean warm water, dry them with a tea towel, and slide them back into your clean oven.

Maintaining a Clean Oven Between Deep Resets

Keeping the oven fresh takes very little effort once you remove the old layer of grease. Good housekeeping habits prevent burnt sugar and roasting juices from baking onto the base week after week. Quick maintenance stops strong smells from filling the kitchen every time you turn the heat to bake.

Place a wide rimmed baking sheet on the lowest wire rack whenever you roast chicken, bake pies, or cook greasy casseroles. The sheet catches all the dripping fat before it hits the hot bottom enamel. If a spill happens during dinner, sprinkle two pinches of salt right onto the wet puddle while the oven cools, then sweep the dry ash out the next morning.

Under the Sink Organization That Stays Neat for Good

Under the Sink Organization That Stays Neat for Good
Photo: Wikimedia Commons

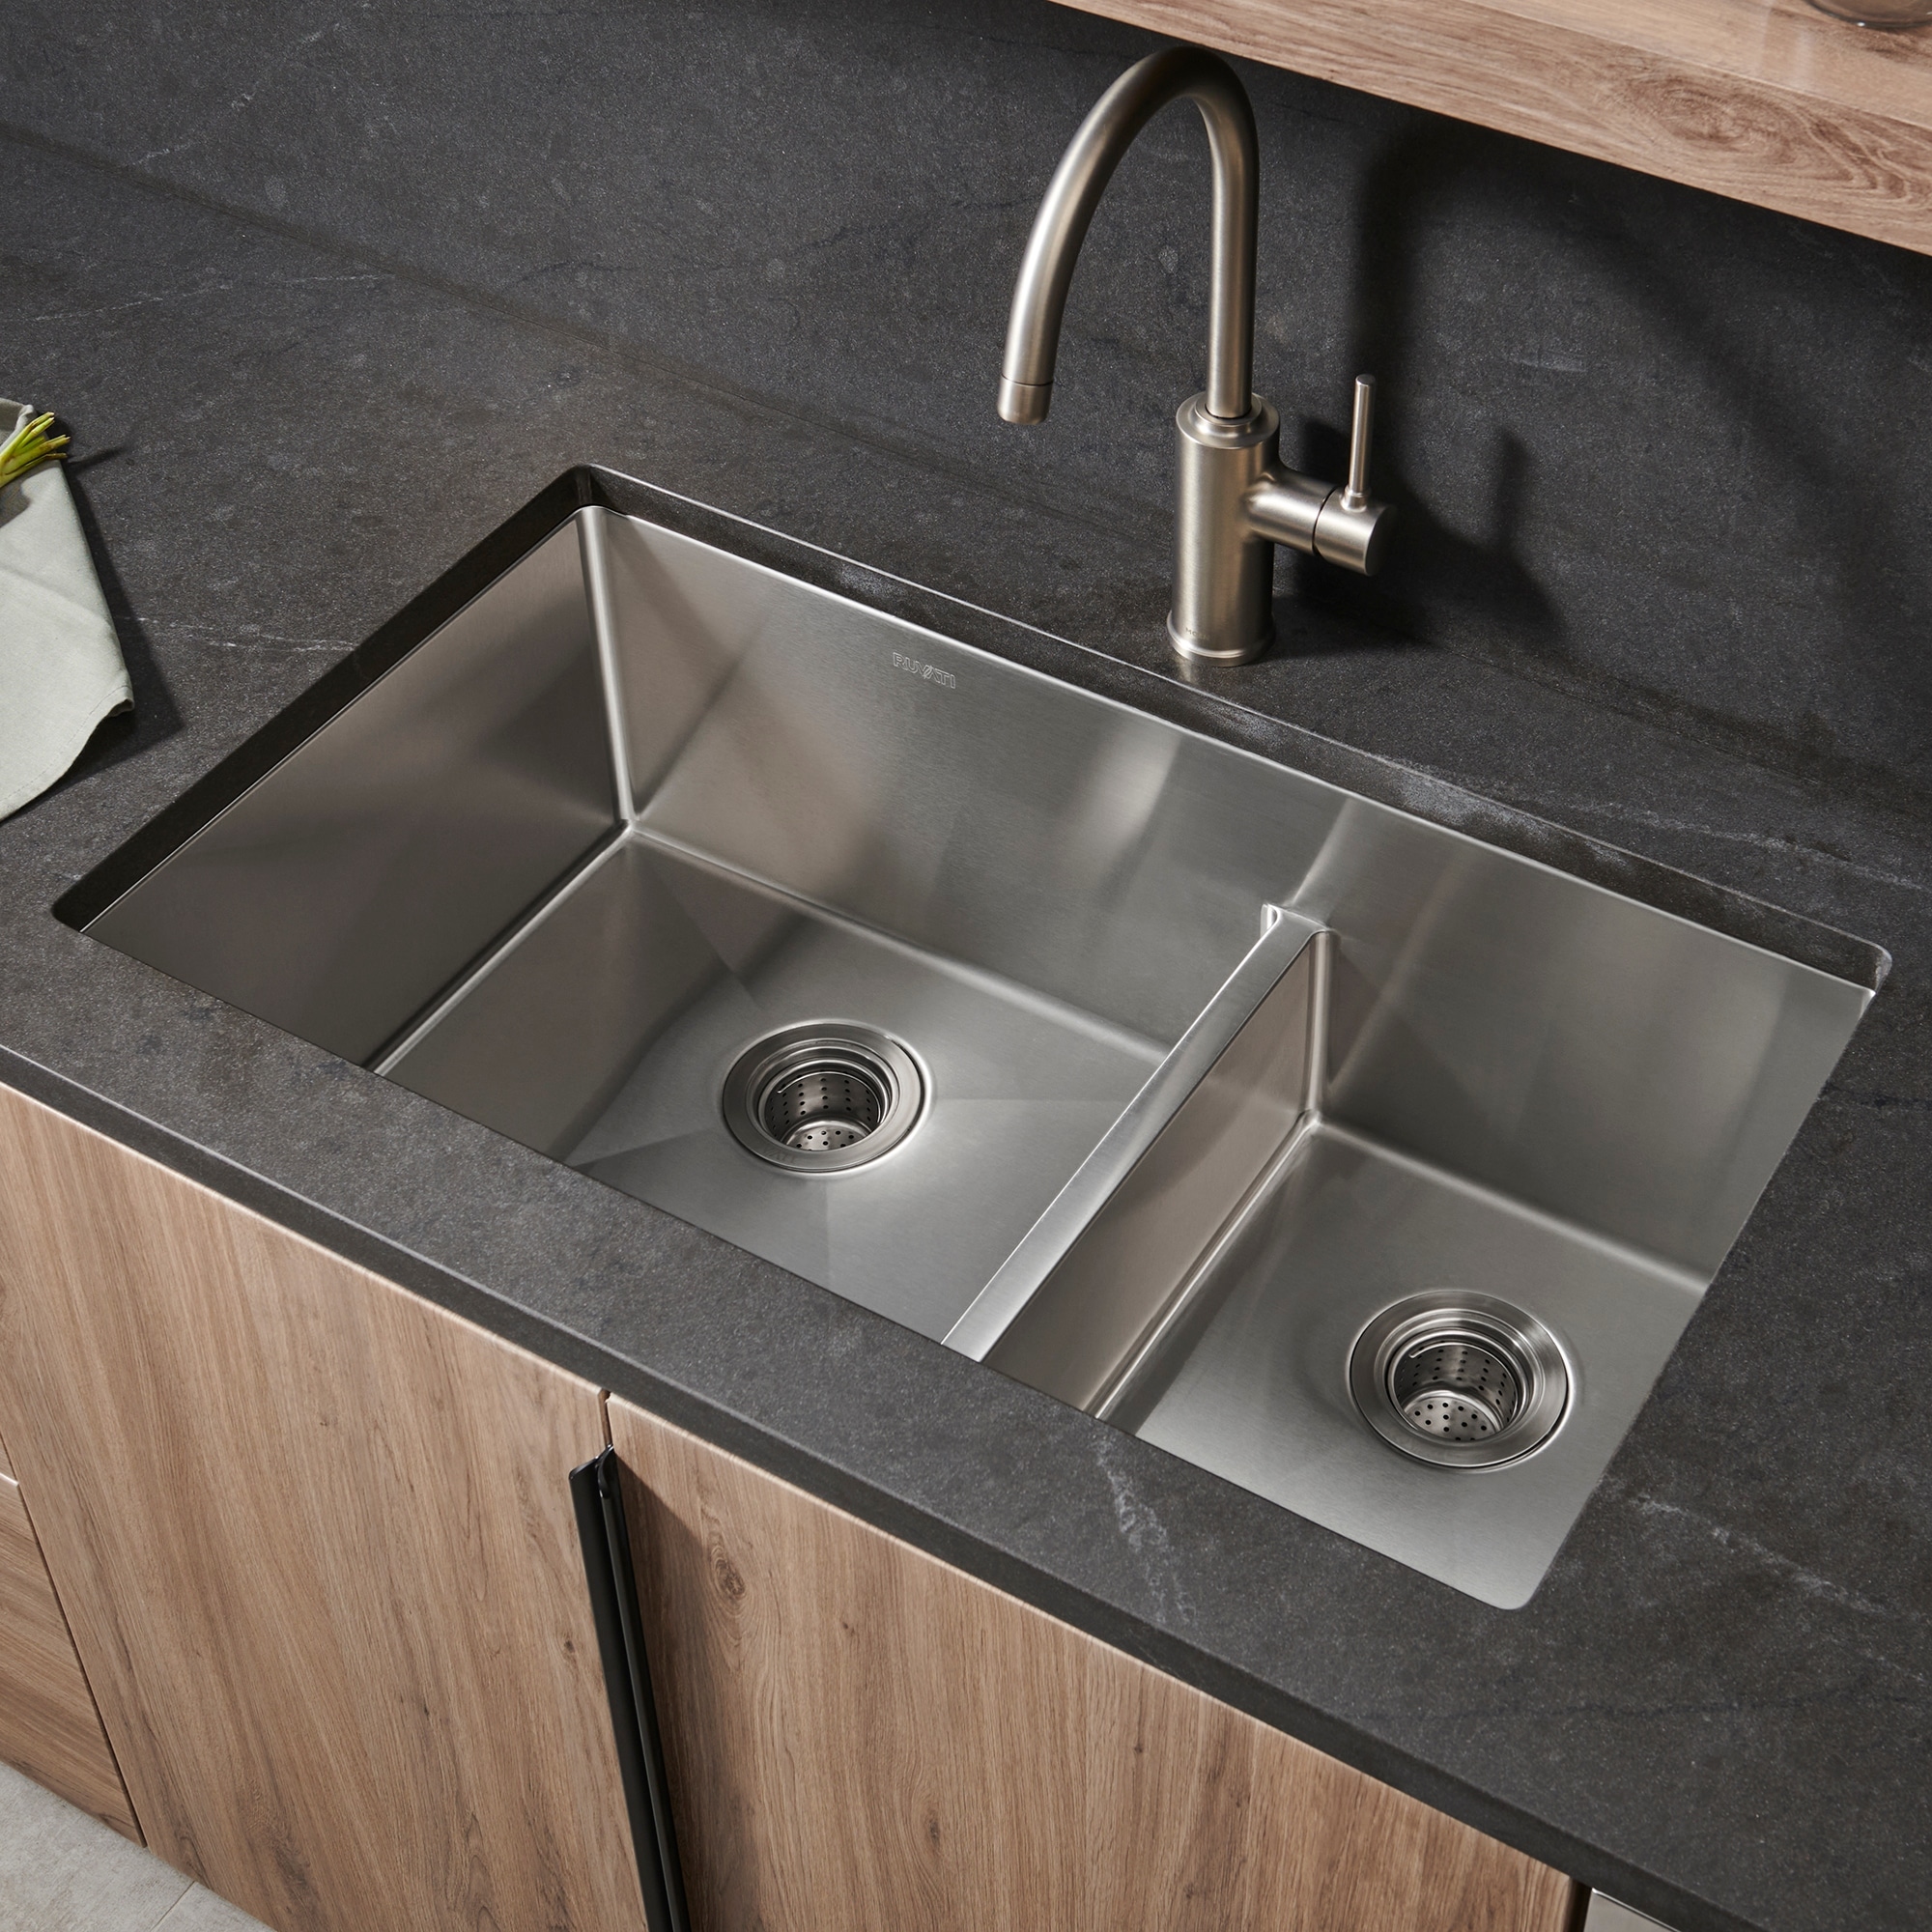
To get under the sink organization that stays neat, you must build around your plumbing rather than fighting it. Group your bottles by how often you reach for them, not by what room they clean. Once you set up clear physical boundaries, bottles will not tip over or hide in the dark corners.

How to organize under the kitchen sink and keep it clean?

Most under-sink cabinets turn into a jumble within two weeks because everyday items get shoved in front of spare supplies. When you need a dishwasher tablet or trash bag, you knock over three bottles to reach it. The fix is setting up clear zones on both sides of the center pipe.

Start by pulling every single item out onto the kitchen floor. Wipe the cabinet base clean with warm soapy water and let it dry for ten minutes. Check the wood under the pipes for any small leaks or damp spots before you put a single bottle back inside.

  • Daily items on the right: Dish soap, hand soap, counter spray, and fresh sponges go in the spot easiest to reach with your dominant hand.
  • Weekly tools on the left: Floor wash, oven cleaner, descaler, and backup sponges go on the opposite side.
  • Back-row reserves: Extra scrubbers, bulk refill bottles, and seasonal items sit behind the front bins.
  • Center floor clear: Keep the narrow floor strip directly under the drain trap open so you spot leaks immediately.
Under the Sink Organization That Stays Neat for Good
Photo: Openverse

The two-bin rule for tricky pipe layouts

Plumbing pipes drop down right through the center of your storage space. Instead of buying wide organizer racks that hit the P-trap, use two separate, narrow caddies with tall handles. This method is a core principle in professional organizing because small modular containers adapt to any odd cabinet shape.

Choose plastic bins with open tops rather than drawers with lids. Open caddies let you drop items straight in with one hand while holding a wet dishcloth with the other. A handled caddy also lets you lift your entire counter-cleaning kit out in two seconds when you need to clean the sink itself.

What to keep under the sink and what to move

A major cause of under-sink clutter is keeping items there that belong elsewhere. The dark, slightly damp air under a sink is bad for paper goods and dangerous for mixed chemicals. Streamlining what lives here makes basic housekeeping much faster every evening.

  • Keep: Dishwasher pods in an airtight plastic tub to keep steam out.
  • Keep: One bottle of daily surface spray, one dish soap, and one scrub brush.
  • Keep: A small open bin for clean microfiber cloths folded upright.
  • Move: Paper towel multi-packs, which soak up moisture and steal huge amounts of room.
  • Move: Harsh chemicals like drain unblockers, which belong on a high shelf away from kids and pets.
  • Move: Old rags with holes, paint cans, and mystery bottles without clear labels.

How to keep your under the sink organization that stays neat

Once your caddies sit on either side of the pipe, create a firm limit on your bottle count. Decide on five active spray bottles total for the entire kitchen. When one bottle runs out, recycle it before opening a new one so excess inventory never spills across the shelf.

Take two minutes every Sunday night to wipe down the cabinet baseboard and check the bottom of your drip caddy. A quick weekly check keeps grease and water rings from setting into the wood. When your storage fits your daily habits, the space stays tidy on its own for months.

Ten Minute Tidy for When Guests Are on the Way

Ten Minute Tidy for When Guests Are on the Way
Photo: Wikimedia Commons

A ten minute tidy for when guests are on the way focuses only on what visitors see and smell. Grab a laundry basket, a microfiber cloth, and a trash bag right now. Move through three specific spots in your home in a set order to look completely pulled together before the doorbell rings.

Grab your basket for the two minute main room sweep

Start in the entryway and immediately step into the living room. Do not sort items or put things back into their proper drawers right now. Drop every out-of-place toy, piece of mail, stray shoe, and jacket into your laundry basket. Carry the basket into your bedroom or closet and shut the door behind you.

Setting up simple systems like this is a core part of housekeeping when you are short on time. Once the floor and flat surfaces are cleared of loose piles, your main space instantly feels calm. You can sort through the basket tomorrow morning when you have twenty quiet minutes.

Ten Minute Tidy for When Guests Are on the Way
Photo: Wikimedia Commons

How do you clean the house when guests are coming in 10 minutes?

You make the home look clean by resetting eye-level surfaces and adjusting the light. People notice cushions, coffee tables, and kitchen counters before they notice dust in corners. Spend three minutes straightening soft items and putting away visible kitchen mess.

  • Fluff the sofa cushions: Straighten the back pillows, flip seat cushions if needed, and drape a throw blanket neatly over the back corner.
  • Wipe the coffee table: Use your cloth to remove mug rings, push coasters together, and stack any books into one neat pile.
  • Clear the kitchen island: Move dirty dishes straight into the dishwasher or stack them neatly inside an empty sink basin so the counter looks clear.
  • Dim harsh overhead lights: Turn off bright ceiling fixtures and switch on warm floor lamps or table lamps to soften the room.

Spend three minutes on the guest bathroom

Your guests will almost certainly visit the bathroom, so give this room three dedicated minutes. Take your microfiber cloth and wipe down the sink basin, the faucet, and the top of the counter to clear stray water drops and soap residue. Put away daily toiletries, makeup bags, and toothbrushes inside the medicine cabinet or vanity drawer.

Basic cleaning of high-touch spots takes very little time but makes people feel comfortable right away. Finish the room with two quick steps:

  • Hang a fresh hand towel: Remove the damp family towel and put out a clean, dry towel right next to the sink.
  • Check the paper roll: Ensure the toilet paper roll has plenty left, and close the toilet lid completely.

The final two minute reset for air and entry

Spend your final two minutes at the front door where your guests will first arrive. Line up the household shoes in a straight row against the wall or tuck them away in a hall cupboard. Clear off three coat hangers or open up a couple of wall hooks so your guests have an obvious place to hang their jackets.

Finish by refreshing the air in your main entryway and living area. Crack open the front door or a front window for sixty seconds to bring in cool, fresh air, then close it. Light a clean, subtle candle near the front hall or spray a quick mist of room spray. Your ten minutes are up, your surfaces are clear, and your home is ready for company.

Cleaning the Oven Without Harsh Chemicals (The Overnight Steam Method)

Cleaning the Oven Without Harsh Chemicals (The Overnight Steam Method)
Photo: Wikimedia Commons

Cleaning the oven without harsh chemicals takes fifteen minutes of active work and one full night of waiting. You can remove baked-on grease using baking soda, water, and white vinegar. This method lifts burnt spillages safely without leaving strong fumes in your kitchen.

How do I clean my oven without using commercial spray?

Most commercial oven cleaners rely on sodium hydroxide to dissolve burnt food. You can get the same results using basic home supplies and extra resting time. Baking soda acts as a mild abrasive that breaks down carbonized spots, while water softens the hardened grease over several hours.

Before you begin, pull out the oven racks and clear away loose crumbs from the floor of the appliance. You will apply a simple paste directly to the glass, sides, and bottom panels. Follow these preparation steps to set up your workspace safely:

  • Mix one cup of baking soda with three tablespoons of water in a small bowl until it forms a thick paste.
  • Spread the paste over all interior surfaces, keeping it away from the heating elements and gas pilot holes.
  • Let the paste sit on the stubborn spots for at least eight hours or overnight.
  • Wipe the dry paste away the next morning with a damp microfiber cloth.
Cleaning the Oven Without Harsh Chemicals (The Overnight Steam Method)
Photo: Wikimedia Commons

Cleaning the oven without harsh chemicals on the glass door

Oven door glass collects dark grease spots that block your view while cooking. Spraying liquid cleaners on hot glass can weaken it, so you should always wait until the appliance is completely cold. The glass panel needs a gentle paste and a soft scraper to protect the surface from scratches.

Lay a wet towel over the glass for ten minutes to soften the grease before applying your baking soda mix. Once the paste has rested overnight, use a plastic spatula to lift thick patches of carbon. Finish by wiping the panel with pure white vinegar to remove any cloudy white film and leave the glass clear.

Using steam to dissolve heavy baked-on grease

If your oven has thick spillovers from pie fillings or roasted meat, adding steam to your routine speeds up the process. Heat softens hardened oil much faster than cold wiping alone. Combining hot water vapor with natural ingredients allows you to wash away grime without harsh fumes.

You can create an internal steam treatment using a standard ovenproof dish. This step works best right after you finish baking dinner while the walls are still warm. Here is how to set up a quick steam cycle in your kitchen:

  • Fill a glass baking dish with boiling water and half a cup of plain white vinegar.
  • Place the dish on the center rack and close the oven door tightly.
  • Set the oven temperature to three hundred degrees Fahrenheit for twenty minutes.
  • Turn off the heat, leave the door closed for thirty minutes, then wipe down the soft interior walls.

Restoring your dirty metal oven racks

Oven racks collect burned oil along every wire rung, making them difficult to scrub with a small sponge. Cleaning them inside your sink can scratch the enamel finish of your basin. The easiest approach is soaking the racks in warm water to loosen the dark crust.

Line your bathtub with two old bath towels to protect the enamel surface from metal edges. Lay the racks flat on the towels, cover them with warm tap water, and add half a cup of dish soap. Let the metal soak for two hours, then scrub the rungs with a ball of crumpled aluminum foil to remove all remaining spots.

Maintaining a clean oven with regular simple habits

Keeping your oven free from burnt food is easier when you practice basic preventative Housekeeping habits. Small drips turn into hard carbon spots when they go through multiple heat cycles. Catching spills early prevents the need for deep scrubbing later in the month.

Place a non-stick oven liner or a sheet of heavy foil on the bottom rack to catch falling oil and crumbs. If a spill happens while baking, sprinkle a layer of salt over the wet grease immediately. Once the oven cools down, the salted spot will lift off in one solid crust, keeping your appliance clean without extra effort.

Under the sink organization that stays neat

Under the sink organization that stays neat
Photo: Wikimedia Commons

You can achieve under the sink organization that stays neat by using vertical stackable bins and clear zones for your daily items. This process requires removing every single item to measure the usable height around your pipes. A successful system relies on keeping only the products you use every single week in the front row.

How to clear and measure your cabinet

The first step to a tidy cabinet is a total reset of the space. Empty everything out onto your floor and wipe down the base of the cupboard with a damp cloth. This is the best time to check for any slow leaks from your pipes or water damage on the floorboards. Most people find bottles they have not touched in years which should be discarded or moved to a long term storage area like a garage or laundry room.

Grab a measuring tape and record the width, depth, and height of the interior. Do not just measure the door frame because the inside is usually wider. Note the position of the sink drain pipe and the garbage disposal if you have one. These obstacles usually divide your cabinet into a tall side and a short side. Write these numbers down before you buy any containers so you do not waste money on bins that are too wide or too tall to fit under the plumbing.

Under the sink organization that stays neat
Photo: Wikimedia Commons

Create your sorting categories

Sorting your items into groups makes it easier to find what you need during your daily housekeeping routine. Grouping like with like prevents you from buying duplicates of the same glass cleaner or dish soap. Use your floor space to create piles based on how often you reach for each item. This prevents the back of the cabinet from becoming a graveyard for half empty bottles.

  • Daily Essentials: Dish soap, sponges, and all purpose spray.
  • Weekly Cleaning: Floor cleaner, glass spray, and microfiber cloths.
  • Occasional Use: Drain openers, specialized stone polish, or extra scrub brushes.
  • Trash and Recycling: Extra bin liners and grocery bag collectors.

Choose the right containers for the space

The secret to keeping this area neat is using the vertical space that usually goes to waste. Use clear acrylic drawers or stackable plastic bins so you can see exactly what is inside without digging. If your pipes are in the way, look for a two tier sliding shelf designed to fit around a central drain. This allows you to pull the bottom drawer out completely to reach the items at the very back of the dark cupboard.

If you prefer a more flexible approach, consider these specific tools:

  • A tension rod placed high up to hang spray bottles by their triggers.
  • Clear adhesive bins on the inside of the cabinet doors for sponges.
  • A rotating turntable for heavy bottles like bleach or vinegar.
  • Small clip-on hooks for hanging scrub brushes or rubber gloves.
These tools ensure that every item has a specific home, which is a core principle of professional organizing for small spaces.

The thirty minute assembly process

Once you have your bins and sorted piles, it is time to put everything back in a logical order. Place your daily essentials on the side of the sink you use most often. If you are right handed, put your dish soap and sponge on the right side. Put the items you use once a month in the very back or on the bottom of a stacked drawer set. This ensures you never have to move five things just to get to the one thing you need right now.

Take ten minutes to label your bins if you share your home with others. Use a simple label maker or a permanent marker on a piece of tape. Labeling tells everyone else exactly where the sponge belongs so the cabinet stays organized after you finish the work. Spend the last five minutes of your half hour checking that the cabinet doors close fully without hitting any of your new bins. A clear path to your cleaning supplies makes every chore feel much easier to start.

How to Get Rid of Kitchen Smells for Good

How to Get Rid of Kitchen Smells for Good
Photo: Openverse

You can learn how to get rid of kitchen smells for good by clearing the hidden grease traps where old odors cling. Most bad smells do not come from the air, but from oil droplets on your stove hood, settled film on walls, and food film inside your sink drain. A quick twenty-minute target routine breaks down these oils so your room stays fresh without scented sprays.

The Four Hidden Spots Holding Old Food Smells

Cooking odors settle on surfaces that feel slightly sticky or damp. Air fresheners only layer perfume over the top of the oil film. When heat hits old grease the next day, the trapped scent rises right back into the room.

Take ten minutes to check these exact problem zones before doing any general cleaning in the room:

  • The range hood mesh filter: This metal screen catches hot oil droplets every time you cook.
  • The splash area behind the stove: Tiny grease specks fly up to three feet above your pans.
  • The kitchen sink drain and rubber baffle: The black rubber ring under the disposal holds rotting food residue.
  • The cabinet tops above the cooktop: Rising steam carries grease film directly to the top edge of your upper cabinets.
How to Get Rid of Kitchen Smells for Good
Photo: Wikimedia Commons

How to get rid of kitchen smells for good from your drain

The sink drain is the most common cause of a sour kitchen scent. Fats stick to the pipe lining and slowly spoil. Pouring warm water down the opening softens the fat, but you need friction and a simple acid wash to lift it completely away from the walls of the pipe.

Start by boiling four cups of tap water in your kettle. Pour half a cup of plain baking soda straight into the drain hole, then pour one cup of plain white vinegar right over it. Let the mixture fizz for ten minutes. Finish by pouring the boiling water directly down the drain to flush the loosened paste away.

Degrease the Cooktop Hood and Filters

Your range hood filter holds months of old frying smells. If your kitchen smells like dinner from three days ago, the filter screen is usually the cause. Good routine housekeeping keeps this part clear so your vent fan can pull new smoke out of the room properly.

Follow these quick steps to strip the grease in under fifteen minutes:

  • Pop the metal mesh filters out of the vent hood frame.
  • Fill your sink basin with very hot tap water and two tablespoons of grease-cutting liquid dish soap.
  • Add half a cup of baking soda and submerge the mesh filters completely for ten minutes.
  • Gently scrub both sides with a soft bristle dish brush, rinse with warm water, and dry them flat on a towel before replacing them.

Wipe Down the Upper Splatter Zones

Oils travel with steam and land on the vertical surfaces near your stove. Walls, tile grout, and cabinet faces collect a thin coat of residue that standard dusting never touches. This thin grease coat warms up every time your oven turns on, releasing stale food smells.

Mix two cups of warm water with one teaspoon of dish soap in a bowl. Dip a clean microfiber cloth into the sudsy water, wring it out until it is barely damp, and wipe the cabinet doors closest to the stove. Follow right behind with a dry cotton towel. Removing this film eliminates the main source of persistent room odors in just a few minutes.

Reset the Trash Can and Floor Basin

A plastic trash bin absorbs food liquids through small scratches in the plastic. Even when you pull the trash bag out, the empty barrel often still carries a sharp odor. Crumbs also fall beneath the can and get trapped along the baseboards.

Take the empty trash bin to the bathtub or back step once a month. Spray the entire inside with warm water and a splash of dish soap, wipe it down with a sponge, and dry it with an old rag. Sprinkle two tablespoons of dry baking soda into the very bottom of the dry plastic bin before you drop in the new trash bag. The powder catches drops and neutralizes sour odors at the base.

Tuesday, November 17, 2026

Under the Sink Organization That Stays Neat for Good

Under the Sink Organization That Stays Neat for Good
Photo: Wikimedia Commons

To get under the sink organization that stays neat, you need to stop filling the center of the cabinet and start grouping items strictly by chore. Measure around your plumbing pipe first, place two shallow caddies on the sides, and leave the middle floor completely clear for daily spray bottles. This simple layout keeps everything visible and prevents bottles from hiding in the dark corners.

How do I organize under the kitchen sink?

The cabinet under the sink is tricky because plumbing pipes, garbage disposals, and water lines cut right through your storage area. Most people make the mistake of buying large square bins that hit the pipes or push items deep into the back where they are forgotten. Effective professional organizing begins by emptying the entire cabinet and wiping the floor down with warm water and soap.

Once the base is clean, sort your items into three clear piles: daily dish care, weekly cleaning supplies, and spare refills. Throw away empty bottles, crusty sponges, and cleaners you have not touched in six months. Grouping items by how often you use them makes it easy to put things away with one hand while you work at the sink.

Under the Sink Organization That Stays Neat for Good
Photo from the web

The three-zone layout for under the sink organization that stays neat

A good cabinet stays neat because every bottle has an assigned spot based on how often you reach for it. When you divide the floor space into distinct zones, family members can put things back in seconds without shifting other items around.

  • The Right Zone for Daily Washing: Put your dish soap, dishwasher pods, and a small holder for clean sponges on the side closest to your dominant hand.
  • The Left Zone for Weekly Tasks: Use a narrow caddy with a handle on the opposite side to hold your surface sprays, glass cleaner, and scrub brushes.
  • The Center Drop Zone: Leave the space right beneath the main pipe empty except for your one most-used daily all-purpose cleaner.
  • The Back Wall for Overstock: Place extra trash bags and bulk refill bottles against the back wall where they stay out of the way until needed.

Smart tools that handle pipes and tight spaces

Traditional shelving rarely fits around sink drains, so you must choose tools that adjust to odd heights. Avoid solid stacking drawers that block access to shut-off valves in an emergency. Practical cleaning routines depend on having fast access to supplies without fighting stuck bins.

A small two-tier sliding drawer designed for narrow spaces works best on the side away from the disposal unit. Install a stick-on metal rack or adhesive hook on the inside of the cabinet door to hold gloves or a pack of microfiber cloths. Clear acrylic caddies let you see bottle levels immediately, so you never buy duplicates of cleaners you already own.

Rules to keep the cabinet tidy every week

Keeping this space neat over time requires two small habits that prevent clutter creep. The most common problem is letting wet rags sit inside the dark cabinet, which ruins the wood base and causes musty smells throughout your kitchen.

  • Hang damp microfiber cloths over the edge of a small caddy or let them dry on a laundry rack before putting them away.
  • Never place cardboard boxes under the sink, because dampness weakens paper packaging and invites small pests.
  • Check the back corners once every month on trash day to wipe away any dust or stray water drops.
  • Limit your supplies to one working bottle of each product, storing extra bulk refills in a utility closet or garage.

Simple adjustments for deep bathroom vanities

Bathroom sink cabinets bring extra challenges like tall hair tools, extra toilet rolls, and personal care products. The same basic rule applies: measure around the curved P-trap pipe before you place a single bin on the shelf. Keep your daily morning face wash and dental care at the front left, while placing spare soaps toward the back.

Use clear turntable bins in bathroom vanities with tall ceilings, because rotating a turntable brings items out from behind the pipe without knocking over standing bottles. Keep your hair dryer in a heat-safe wire basket on the door or along the side wall. When every morning staple has its own dedicated bin, the shelf stays orderly all week long.

Cleaning the Oven Without Harsh Chemicals in 3 Easy Steps

Cleaning the Oven Without Harsh Chemicals in 3 Easy Steps
Photo from the web

Cleaning the oven without harsh chemicals is simple when you let time do the hard scrubbing for you. A thick paste of baking soda and water breaks down baked-on grease overnight so it wipes away with a damp cloth in the morning. You get a spotless oven without breathing in strong fumes or wearing heavy rubber gloves.

How do you clean an oven without harsh chemicals?

The secret is using baking soda, water, and plain white vinegar in the right order. Baking soda is mildly abrasive and naturally alkaline, which allows it to soften baked-on acids and fats without scratching your appliance enamel. When you pair it with a light spray of vinegar the next day, the gentle fizz lifts any leftover residue right off the metal.

Good routine cleaning keeps this task quick instead of turning it into an all-day chore. You only need a few basic kitchen items to get started:

  • Half a cup of baking soda: This forms the base of your cleaning paste.
  • Three tablespoons of warm water: Add just enough to make a spreadable paste like frosting.
  • White distilled vinegar: Put half a cup into a clean spray bottle.
  • A soft dish sponge and microfiber cloth: Use these for spreading the paste and wiping it clean.
  • A silicone spatula: Perfect for scraping up thick, dried residue without scratching enamel.
Cleaning the Oven Without Harsh Chemicals in 3 Easy Steps
Photo from the web

Prep the oven and apply the paste

Start by pulling out all your oven racks, the thermometer, and any pizza stones you keep on the bottom. Set the wire racks in the sink or bathtub with warm water and two squirts of dish soap while you treat the inside cavity. Take a dry paper towel and sweep out any loose crumbs or burnt ash sitting on the floor of the oven.

Mix your baking soda and water in a small bowl until it forms a smooth, spreadable paste. Put on a pair of regular dish gloves and spread the mixture over the floor, side walls, and back of the oven. Keep the paste away from bare heating elements, gas nozzles, and the rubber seal around the door. Let the paste sit undisturbed for at least eight hours, or overnight while you sleep.

Wipe down the inside and spray with vinegar

In the morning, the paste will look dry and chalky as it traps the grease. Take a wet sponge and begin wiping the walls from top to bottom, rinsing your sponge in a bucket of warm water often. Most of the brown grease will come away directly on the sponge with light pressure.

For stubborn corners, grab your spray bottle of white vinegar and mist the remaining paste spots directly. The vinegar reacts with the baking soda to create a light foam that loosens the final bits of burnt sugar and fat. Finish with a clean, dry microfiber cloth to buff the interior dry and leave a streak-free shine.

Clean the oven door glass without scratching

Oven door glass needs a slightly gentler touch to protect the seal and prevent streaks between the panes. Mix equal parts baking soda and water in a small cup to make a thinner paste, then smooth it across the glass with your fingertips. Let it sit for twenty minutes to soften drips from past roasts and casseroles.

Consistent housekeeping makes glass maintenance much easier over time. Wipe the glass using smooth circular motions with a soft sponge, then wipe it clean with a damp towel. Mist the glass with a little plain water, dry it thoroughly with a lint-free cloth, and your door will look crystal clear again.

  • Wipe spills early: Drop a sprinkle of salt on warm fresh spills to soak up grease before it burns.
  • Protect the bottom: Place a baking sheet on the lowest wire rack to catch bubbling pies.
  • Use a ten-minute steam: Place a heatproof bowl of hot water inside for ten minutes before wiping light grease.
  • Clean every season: Doing this quick paste reset every three months stops grease from baking solid.

How Often to Wash Everything in Your Home: The Real Master Schedule

How Often to Wash Everything in Your Home: The Real Master Schedule
Photo: Wikimedia Commons

Most items in your home follow a predictable rotation based on daily use and moisture levels. Washing your bedding every seven days, bath towels after three uses, and heavy soft furnishings twice a year keeps your space clean without overloading your laundry basket. Here is the exact breakdown for every item in your house so you never have to guess again.

How often to wash everything in your home

A sensible routine splits your washing into weekly items, monthly items, and seasonal tasks. Keeping to a steady schedule stops bacteria, dust mites, and oils from building up on your fabrics. It also protects your clothes and linens from wearing out too fast in the machine.

When you know the right frequency for each item, laundry day stops feeling like a continuous guessing game. You can plan your loads by weight and fabric type, which saves both energy and time. Following a set plan keeps your home fresh with minimal daily effort.

  • Every 3 to 4 days: Bath towels, hand towels, and kitchen dishcloths.
  • Every 7 days: Bed sheets, pillowcases, and bath mats.
  • Every 14 days: Mattress protectors, duvet covers, and cloth napkins.
  • Every 30 days: Bed pillows, throw blanket covers, and kitchen seat cushions.
  • Every 3 to 6 months: Curtains, duvet inserts, mattress pads, and couch covers.
How Often to Wash Everything in Your Home: The Real Master Schedule
Photo: Wikimedia Commons

The weekly laundry rotation that keeps bed linens fresh

Bed sheets collect skin cells, natural body oils, and dust every single night. Washing your sheets and pillowcases once every seven days in warm water breaks down these oils before they settle into the fibers. If you have pets that sleep on the bed, shorten this cycle to every four or five days.

Towels hold onto moisture in small bathrooms, which makes them a hot spot for mildew. Swap out your bath towel after three solid uses, and ensure it hangs completely flat to dry between each use. Hand towels in shared bathrooms pick up heavy traffic and should be replaced every two days without exception.

  • Strip the bed every Sunday morning and load sheets immediately into the wash.
  • Use medium heat for cotton sheets to kill bacteria without shrinking the weave.
  • Hang bath towels on broad bars rather than hooks so they dry twice as fast.
  • Keep three sets of sheets per bed so you can rotate them cleanly.

Monthly deep cleaning for pillows and cushions

Many people forget that bed pillows and couch cushion covers need regular care. Sweat seeps through pillowcases and settles into the core of your pillow, which causes yellowing and attracts dust mites. Washing your bed pillows every month in warm water keeps their loft and removes trapped sweat.

Kitchen chair pads and living room throw blanket covers absorb cooking odors and daily dust. Run these through a gentle machine cycle every four weeks. Check the care tags first, but most cotton and synthetic covers handle a cold wash and low heat tumble dry perfectly well. You can learn more about standard household maintenance through established Housekeeping methods to extend the life of your soft goods.

Seasonal fabric care for curtains and heavy bedding

Heavy drapes, window blinds fabric, and thick duvet inserts only need attention two to four times a year. Curtains act as giant filters for room air, catching dust, pollen, and pet dander over long periods. Vacuum them monthly with a brush attachment, and wash or dry clean them at the turn of spring and autumn.

Duvet inserts and heavy winter blankets should be washed right before you store them away for warm weather, and once halfway through the cold season. Storing clean fabrics prevents stains from setting over months in a closet. Basic regular care is the foundation of effective home Cleaning routines that stay easy to manage.

Setting up a simple washing schedule that sticks

The easiest way to maintain this schedule is to assign specific items to specific days of the month. Never try to wash all your heavy linens on the same weekend. Spread the work out so your washing machine and drying lines never get overwhelmed by bulky loads.

Keep a small card inside your laundry cupboard listing the month each big item was last washed. When you strip a bed or take down drapes, write down the date. This simple habit keeps your mind clear and your home running smoothly all year long.

Spring Cleaning List for Every Room: A Simple Plan

Spring Cleaning List for Every Room: A Simple Plan
Photo: Openverse

A simple spring cleaning list for every room helps you reset your home without feeling overwhelmed. Work through one space at a time using basic supplies like microfiber cloths, dish soap, warm water, and a vacuum. Expect to spend about forty-five minutes on each main area of your house.

How do I start a spring cleaning list for every room?

To begin your full house deep clean, gather your tools in a caddy so you do not waste time walking back and forth. Open the windows in each space for fresh air, pull back the curtains, and dust from the top of the space down to the floor. This method ensures that loose dirt falls to the ground before you sweep or vacuum.

Work clockwise around each area so you never wonder what step comes next. Focus on high surface areas first, like light fixtures, ceiling fan blades, and the tops of door frames. Once the high dust is cleared, you can move down to furniture, countertops, and baseboards without dirtying clean spots.

Spring Cleaning List for Every Room: A Simple Plan
Photo from the web

Kitchen spring cleaning checklist

The kitchen requires a thorough touch because grease and dust collect on cabinet doors and appliances over time. Spend sixty minutes in this space focusing on deep dirt and forgotten corners. Wipe down every hard surface using a bowl of warm water mixed with a few drops of mild dish soap.

  • Wipe the tops and fronts of all wooden or painted cabinets with a damp cloth.
  • Empty the refrigerator, throw away expired jars, and wash the glass shelves.
  • Pull out the stove and refrigerator to sweep up dust and crumbs behind them.
  • Soak the microwave turntable in warm soapy water and wipe the interior walls.
  • Clean the kitchen sink drain with baking soda and warm white vinegar.
  • Mop the floors starting from the furthest corner and working toward the doorway.

Living room and entryway steps

Living spaces accumulate everyday dust, pet hair, and floor scuffs throughout the colder months. Start by pulling furniture away from the walls so you can reach the baseboards and back corners. Vacuum all soft furniture using the upholstery attachment, making sure to remove the cushions to catch stray crumbs underneath.

Take down fabric window curtains to wash or steam them according to their care tags. Wipe down wooden coffee tables, side shelves, and picture frames with a soft cloth. Wash your glass windows on the inside using a simple mix of equal parts warm water and vinegar, then dry them with a dry cloth to prevent streaks. Finishing your basic house cleaning routines in these shared areas creates an instant feeling of order for your family.

Bedroom deep clean guide

A fresh bedroom supports better rest and cuts down on nighttime dust allergies. Strip every bed entirely, including the mattress cover, pillow protectors, and duvet covers. Wash these items on a warm cycle while you work on the rest of the physical space so no time is wasted.

  • Rotate your mattress one hundred and eighty degrees to help it wear evenly.
  • Vacuum the entire mattress surface using a clean brush attachment.
  • Dust nightstands, lamp bases, light switches, and all decorative picture frames.
  • Clear out items stored under the bed and sweep or vacuum the floor thoroughly.
  • Wipe down door handles, closet door edges, and window sills with a damp cloth.
  • Reapply your fresh bed linens and make the bed neatly.

Bathroom reset steps

Bathrooms need focused attention to remove water spots, soap scum, and buildup on hard surfaces. Spray your shower walls, bathtub, and toilet bowl with your choice of cleaner first, then let it sit for ten full minutes before scrubbing. This standing time breaks down grimy residue so you do not have to scrub hard.

While the cleaner works on those fixtures, wash down the mirror using a dry cloth and glass cleaner. Empty out vanity drawers to wipe away stray hairs and dust, throwing away old bottles or empty packages. Finish by scrubbing the shower tile, rinsing the tub, cleaning the toilet, and mopping the floor with hot water. Consistent upkeep and smart daily home care will keep these spaces shining long after your big weekend clean is complete.

Cleaning the Oven Without Harsh Chemicals Overnight

Photo: Wikimedia Commons Cleaning the oven without harsh chemicals comes down to time rather than heavy elbow grease. You mix a simple past...